
Sometimes a special occasion calls for something fancy and complicated. Other times it calls for something simple and delicious that just looks complicated. If the later is your kind of dish then Trifle is the dessert for you. There are so many versions of Trifle but the basics are the same. you need some sort of cake, some sort of liquid and something squishy. Now typically you'll see recipes call for pound cake or lady fingers but I've made trifle with gingersnaps too.
This particular concoction was for a Scentsy party where we all brought food inspired by the different wax scents. I'm a sucker for coconut and citrus so when that combo came my way I knew I had the perfect dessert. So here you have it, Lemon Coconut Trifle.

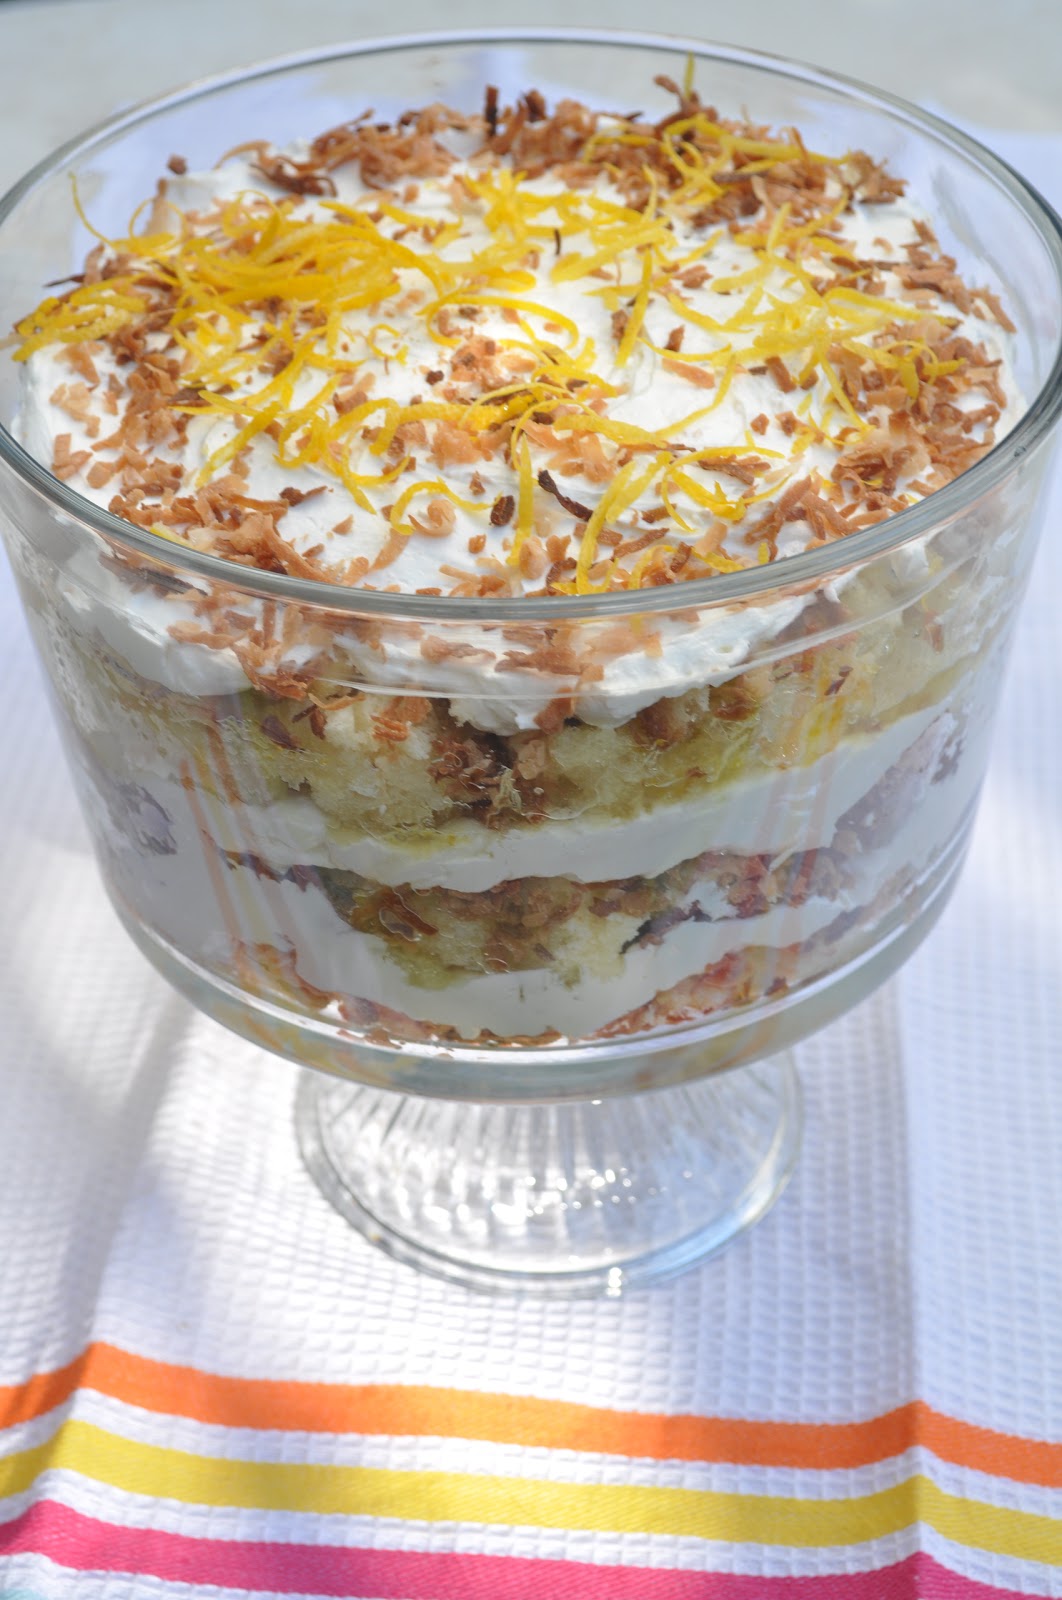
Lemon Coconut Trifle
Ingredients:
3 Lemons
1 c sugar
12 oz whipped cream
5-8 oz lemon curd
1 cup of toasted coconut
1 recipe of Simple Sugar cake http://bolognatobolognese.blogspot.com/2012/09/simple-sugar-cake.html made without the fruit but with the inclusion of 1 1/4 tsp coconut extract and 1/2 cup shredded coconut.
Preparation:
Start by making your cake. While it is baking spread your shredded coconut on a baking tray and just before the cake is done put the coconut in the oven to toast. Watch that it doesn't burn.
Juice the three lemons until you have 1 cup of lemon juice. Pour the lemon juice and zest of two lemons in a small pot on medium heat with one cup of sugar. stir until sugar dissolves. allow mixture to come to a boil and reduce the heat allowing it to simmer until thickened to the desired consistency. Remove from the heat and allow to cool slightly. Make your whipped cream and lemon curd ahead of time or purchase your preferred store bought variety. Before assembling the trifle gently fold the lemon curd into the whipped cream being careful not to over mix.
Now for the assembly. Tear the cake into slightly larger than bite sized pieces. In a trifle dish or glass bowl of your choice begin with a layer of cake. Pour some of the lemon syrup over top (about a tablespoon or two) sprinkle some toasted coconut next and then top with a layer of the whipped cream lemon curd mixture. Continue to layer until your Trifle dish is full ending with a layer of the whipped cream and curd mixture. Garnish with toasted coconut and lemon zest. This desert is best served after being allowed to sit but the last whipped cream layer should not be added until just before serving.


Once assembled it will hold for about a week in the fridge, but that's only if it lasts that long! Of course don't forget that this is just one of many versions. If lemon and coconut don't appeal to you change it up and try a chocolate orange trifle or make up your own combination of your favorite flavors. Whatever you do have fun and make it your own!


